Race Format Overview

Every HYROX race on the planet follows an identical sequence: eight 1km runs, each followed by one of eight functional workout stations. The order never changes. Whether you race in London, Dallas, or Sydney, you will face the same stations in the same order with the same weights. That consistency is what makes HYROX a true benchmark — and it is why mastering each station individually is the single biggest lever you have for improving your total time.
The race begins with a 1km run, followed by the SkiErg. Then another 1km run and the Sled Push. This alternating pattern continues through all eight stations. The sequence is deliberately designed to test different energy systems and muscle groups as fatigue accumulates. The first two stations — SkiErg and Sled Push — load the upper body and legs in relative isolation. The middle stations — Sled Pull, Burpee Broad Jumps, and Rowing — demand full-body coordination under mounting cardiovascular stress. The final three stations — Farmers Carry, Sandbag Lunges, and Wall Balls — are a sustained assault on grip, legs, and mental toughness when your body is already deep in oxygen debt.
What separates experienced HYROX athletes from first-timers is how they handle transitions. The clock does not stop when you finish a run and enter a station zone, or when you complete a station and start running again. Those transition zones — the 20 to 40 seconds it takes to walk to a machine, set up, and begin working — are where minutes are won or lost. Elite athletes move through transitions with purpose: they know exactly where to position themselves, they do not waste time adjusting equipment unnecessarily, and they begin the station within seconds of arriving. A sloppy athlete who pauses, stretches, adjusts their shoes, and takes a few extra breaths at each transition can lose five or more minutes across the full race without realizing it.
Understanding the demands of each station also allows you to pace your runs intelligently. If you know the Sled Push is going to tax your legs heavily, you can ease off the pace slightly in the preceding 1km to arrive with fresher quads. If you know Burpee Broad Jumps will spike your heart rate, you can run the fourth kilometer conservatively and enter the station with a lower pulse. This kind of strategic pacing only becomes possible when you understand what each station demands from your body.
Weights by Division
HYROX stations that involve external load — Sled Push, Sled Pull, Farmers Carry, Sandbag Lunges, and Wall Balls — have different weights depending on your division. The SkiErg, Rowing, and Burpee Broad Jumps are the same distance for everyone. Here is the full breakdown:
Sled Push (50m): Open Men 152kg, Open Women 102kg, Pro Men 202kg, Pro Women 152kg.
Sled Pull (50m): Open Men 103kg, Open Women 78kg, Pro Men 153kg, Pro Women 103kg.
Farmers Carry (200m): Open Men 2x24kg, Open Women 2x16kg, Pro Men 2x32kg, Pro Women 2x24kg.
Sandbag Lunges (100m): Open Men 20kg, Open Women 10kg, Pro Men 30kg, Pro Women 20kg.
Wall Balls: Open Men 6kg ball to 3m target (100 reps), Open Women 4kg ball to 2.7m target (75 reps), Pro Men 9kg ball to 3m target (100 reps), Pro Women 6kg ball to 2.7m target (100 reps).
In the Doubles category, both partners must run all 8km, but station work is split between them — each partner completes half the distance or reps. The weights match the Open division standards. When planning your training, you should be practicing with your division's exact loads. Training lighter than race weight builds false confidence; training heavier builds unnecessary fatigue without mimicking the actual movement demands.
Station 1: SkiErg (1,000 Meters)

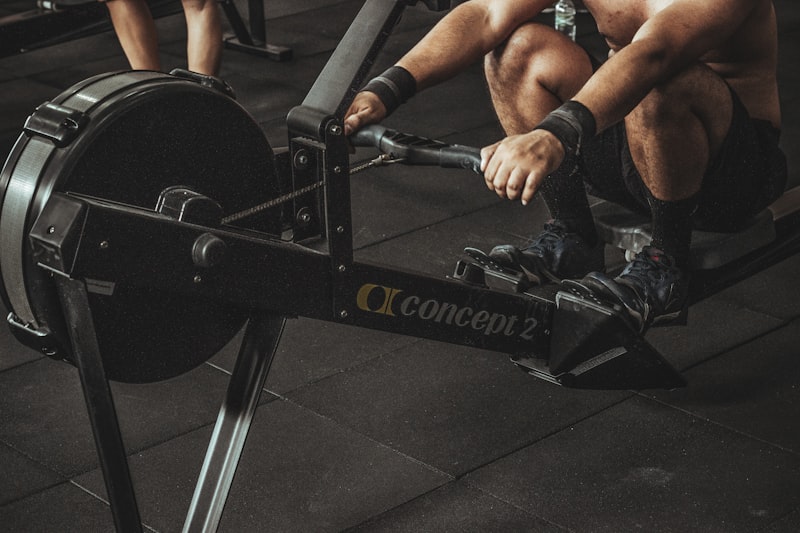
The SkiErg is the first station you encounter after your opening 1km run, and it sets the tone for everything that follows. The movement involves pulling two handles downward on a Concept2 SkiErg machine while standing, covering 1,000 meters of simulated distance. It looks like an arm exercise. It is not. The SkiErg is a hip hinge movement — think Romanian deadlift, not a lat pulldown. Roughly 80 percent of your power should come from your legs and hips, with your arms finishing the stroke.
Start with your feet about hip-width apart, a slight bend in the knees. Reach up to grab the handles with your arms extended overhead. Initiate the stroke by hinging at the hips and pushing your glutes back, exactly as you would at the top of a deadlift. As your torso folds forward, your arms pull the handles down past your hips, finishing somewhere around pocket height. Your knees will bend slightly as you fold, but this is not a squat — the movement comes from the hips, not from bending the legs deeply. At the bottom of each stroke, your torso should be roughly parallel with the floor, your arms extended behind you.
The recovery phase is just as important as the pull. Stand tall, let your arms rise naturally overhead, and reset your hip position before initiating the next stroke. Rushing the recovery leads to a choppy rhythm where you never fully load your hips, which means each stroke generates less power and you have to take more strokes to cover the same distance.
Stroke rate matters enormously on the SkiErg. Many athletes arrive at this station after an aggressive first kilometer and immediately start pulling as fast as possible — 50, 55, even 60 strokes per minute. This is a mistake. A sustainable stroke rate for most HYROX athletes is 38 to 48 strokes per minute. Going significantly faster than that wastes energy because each stroke becomes shorter and less powerful. You end up doing more work to cover the same distance. Focus on long, powerful strokes with a controlled recovery rather than rapid, shallow pulls.
Breathing should synchronize with your stroke cycle. Exhale forcefully as you pull the handles down during the effort phase. Inhale during the recovery as you stand back up. This rhythmic breathing prevents the gasping, uncontrolled respiration that causes many athletes to feel like they are suffocating by 600 meters.
Common Mistakes
Pulling with the arms only. This is the most common error on the SkiErg. Athletes who pull primarily with their arms fatigue their biceps and shoulders within the first 300 meters and spend the remaining 700 meters grinding through a steadily deteriorating stroke. Fix this by exaggerating the hip hinge in training — push your hips back aggressively before your arms even begin to pull.
Standing too upright. If your torso stays vertical throughout the stroke, you are not using your bodyweight to drive the handles down. Your body should fold forward noticeably, bringing your chest toward your thighs at the bottom of each stroke.
Going out too hard. The SkiErg is station one of eight. You cannot win the race here, but you can absolutely ruin it. Starting at a pace you cannot sustain for 1,000 meters will spike your heart rate and leave you struggling to recover on the second 1km run. Aim for a controlled, sustainable effort — about 80 to 85 percent of your maximum.
Training Tips
If your gym has a SkiErg, build your sessions around interval work: 4x250m with 60 seconds rest to develop power, or 2x500m at your target race pace to build specific endurance. For a benchmark, competitive Open athletes typically complete 1,000m in 3:30 to 4:30. First-time racers should aim to stay under 5:00. Practice the SkiErg after a 1km treadmill or track run to simulate the fatigue you will feel in the race transition.
Station 2: Sled Push (50 Meters)
The Sled Push is 50 meters of controlled aggression. You push a weighted sled along the Roxzone floor, driving it forward with your body. The weights are significant: Open Men push 152kg, Open Women push 102kg, Pro Men push 202kg, and Pro Women push 152kg. At the Pro Men level especially, the sled can feel nearly immovable if your technique is poor.
Body position is everything on this station. Around 90 percent of elite HYROX athletes place their forearms on the vertical bars of the sled rather than pushing with extended arms. This forearm position allows you to lean your body weight directly into the sled, transferring force efficiently through a braced core. Your spine should be neutral, your hips roughly level with or slightly below your shoulders, and your heels slightly elevated so you are driving through the balls of your feet.
The initial breakaway — getting the sled moving from a dead stop — is the hardest part. The static friction between the sled and the floor is significantly higher than the dynamic friction once the sled is sliding. Attack the breakaway with short, explosive steps, almost like a sprinter coming out of blocks. Once the sled is moving, shift to steady, powerful strides. Short, compact steps maintain momentum far better than long lunging strides, which cause your body angle to rise and reduce the horizontal force you are applying.
The 50-meter distance is typically divided into four 12.5-meter segments marked on the floor. You can use these markers to pace yourself. For most athletes, pushing the full 50 meters without stopping is neither necessary nor optimal. Taking a deliberate 3 to 5 second pause every 12.5 meters — standing up, taking two deep breaths, then getting back into position — is often faster than grinding through a continuous push that gets progressively slower as your legs fill with lactate.
Surface friction varies between venues. Carpet, rubber flooring, and turf all behave differently, and some venues are notoriously harder than others. You cannot control this variable, but you can prepare for it by training on different surfaces and developing the leg strength to handle heavier resistance than you expect.
Common Mistakes
Standing too upright. When your body angle rises above roughly 45 degrees, most of your force is directed downward into the floor rather than forward into the sled. Stay low. Think about driving your chest toward the sled handles.
Long, lunging strides. Every time you take a big step, you momentarily reduce your forward force as your body rises. Short, choppy, powerful steps keep the sled moving. Think about running in place rather than striding forward.
Stopping mid-push without resetting. If you need to rest, stand up fully, breathe, and then get back into a proper low position before resuming. The worst thing you can do is stop pushing while staying bent over — you recover slower, and your restart is weaker because you never fully reset your position.
Training Alternatives
If you do not have access to a push sled, heavy Prowler work on turf is the closest substitute. Leg press at high weight with a slow eccentric develops the quad and glute strength needed for the push. Wall pushes — leaning into a wall in sled-push position and driving your knees — build isometric strength and help you practice maintaining a low body angle under fatigue. Hill sprints also develop the forward-lean drive pattern used in the Sled Push.
Station 3: Sled Pull (50 Meters)
The Sled Pull requires you to pull a weighted sled 50 meters toward you using a rope, while remaining inside a designated lane box roughly 1.7 meters long. The weights are Open Men 103kg, Open Women 78kg, Pro Men 153kg, and Pro Women 103kg. Unlike the Sled Push, which is about raw leg drive, the Sled Pull demands a combination of grip control, upper back strength, and tactical rope management.
There are two primary techniques, and the best athletes choose based on their body type and strengths. The first is the static pull, where you sit back into a deep athletic stance — think low squat with a proud chest — and pull the rope hand over hand without moving your feet. Grab the rope, pull it all the way to your stomach, immediately regrasp further along the rope, and pull again. Each pull should be a smooth, continuous motion driven by your lats and biceps, with your core braced to prevent your torso from rocking forward.
The second technique is the walk-back method, where you grip the rope, lean back, and walk backward to drag the sled toward your lane. Once the rope runs out, you stay put and pull any remaining slack hand over hand. This method uses more leg drive and less upper-body strength, making it a good option for athletes with strong legs but weaker grips. The downside is that stepping outside your lane incurs a time penalty, so your footwork must be precise.
Regardless of which method you use, rope management is critical. As you pull rope toward you, it piles up at your feet. If you let it accumulate carelessly, it tangles around your shoes or wraps around the sled attachment point, creating resistance that wastes energy and time. Between pulls, use a quick foot shuffle to kick the rope aside, keeping your working area clear.
The initial pull on a fresh rope is deceptive — the first few hand-over-hand motions often just take up slack in the rope rather than actually moving the sled. Do not be discouraged when the sled does not budge immediately. Pull the rope taut first, then apply power. Once the sled begins moving, maintain a steady cadence. Short, controlled pulls are far more efficient than long, sweeping grabs that cause the rope to slip through your fingers.
Common Mistakes
Pulling from a tall position. Standing upright forces you to pull almost entirely with your arms and shoulders, which fatigue quickly under these loads. Sit back, get low, and let your body weight and posterior chain do the work.
Death-gripping the rope. Your forearms have already taken a beating from the SkiErg. Gripping the rope as tightly as possible will accelerate forearm fatigue and compromise your grip for the Farmers Carry three stations later. Use a firm but relaxed grip — tight enough to prevent slipping, loose enough to avoid premature pump.
Losing rhythm. The sled pull rewards steady, metronomic pulling far more than bursts of effort followed by rest. Find a rhythm you can sustain and stick to it.
Training Tips
If you have access to a sled and rope, practice weekly at or above race weight. If not, heavy seated cable rows using a rope attachment, resistance band pulls from a seated position, and heavy bent-over barbell rows build the pulling strength you need. Dead hangs and farmers walks develop the grip endurance that prevents your forearms from failing on race day. As for gloves — most experienced athletes prefer bare hands or thin workout gloves. Thick gloves reduce your feel for the rope and can actually make grip harder.
Station 4: Burpee Broad Jumps (80 Meters)
Burpee Broad Jumps are the station that separates HYROX from every other fitness race. The movement standard is straightforward: place your hands on the ground, kick or step back into a plank, lower your chest to the floor, stand back up, then perform a two-footed broad jump forward. Both feet must be parallel at takeoff and landing — no staggered stances allowed. You repeat this sequence until you have covered 80 meters. There is no set rep count; the number of reps depends on how far you jump each time. Most athletes need between 35 and 55 reps to cover the distance.
This station arrives at the midpoint of the race, after you have already completed the SkiErg, Sled Push, and Sled Pull. Your legs are fatigued, your heart rate is elevated, and you are facing a movement that combines cardiovascular demand with muscular endurance in a way that nothing else in the race matches. It is widely considered the hardest station mentally, because the distance seems to shrink at an agonizingly slow pace. Every rep moves you roughly 1.5 to 2.5 meters, and when you are staring down a lane that still has 40 meters to go, it takes genuine mental discipline to keep moving.
Efficiency is paramount. On the ground phase, you have two options: the jump-back method (kick both feet back simultaneously and then jump them forward to stand) or the step-up method (step one foot at a time back into the plank, then step one foot at a time forward to stand). The step-up method is slower per rep but keeps your heart rate significantly lower. For most HYROX athletes who are not competing for a podium, the step-up method yields a faster overall time because it allows continuous movement without the need for extended rest breaks.
On the broad jump, focus on driving forward rather than upward. Swing your arms aggressively, load your hips, and push through your feet at roughly a 45-degree angle. Jumping high wastes energy without gaining distance. Each extra 10 centimeters of forward distance per jump saves you approximately one full rep over 80 meters — and at the point in the race where Burpee Broad Jumps occur, eliminating even five reps is meaningful.
Breaking the 80 meters into mental segments helps enormously. Rather than thinking about the full distance, focus on reaching the next 10-meter marker. Count your reps in sets of five or ten. If you need to pause, take five seconds — stand upright, take three deep breaths, and then immediately resume. The danger is not in taking a brief rest; the danger is letting a brief rest turn into a long one.
Common Mistakes
Jumping for minimal distance. Short, lazy jumps feel easier in the moment but dramatically increase the number of reps you need. An athlete who jumps 1.5 meters per rep will need 54 reps to cover 80 meters. An athlete who jumps 2.2 meters will need only 37. That is 17 fewer burpees — a significant energy saving in the back half of the race.
Spending too long on the ground. Every second you spend lying on the floor is a second wasted. Get your chest down, get back up, and jump. Your hands should be placed no more than 30 centimeters ahead of your toes — placing them further forward is a rules violation and results in a penalty.
Jumping too high instead of forward. Drive your arms forward, not upward. Your trajectory should be a long, low arc that maximizes horizontal distance.
Training Tips
In training, practice sets of 20 burpee broad jumps and measure the total distance covered. Work to increase that distance over time by improving jump mechanics. Perform burpee broad jumps after a 1km run to simulate race conditions. Build mental toughness by completing longer sets — 40 or 50 unbroken reps — at least once during your training cycle so the 80 meters on race day does not shock you. Box jumps, explosive push-ups, and squat jumps are excellent supplementary exercises for building the power and speed this station demands.
Station 5: Rowing (1,000 Meters)
The rowing station is a 1,000-meter effort on a Concept2 rowing machine, and it arrives at a brutal point in the race — immediately after Burpee Broad Jumps. Both movements tax the posterior chain heavily, so you will sit down on the rower with fatigued hamstrings, a tired lower back, and an elevated heart rate. The temptation is to either collapse into a slow, sloppy row or to sprint the first 250 meters and blow up. Neither approach works. Rowing in HYROX is about controlled, efficient output.
The drive sequence on the rower is legs first, then back, then arms. Push through your heels to extend your legs, lean your torso back slightly past vertical, and then pull the handle to your lower chest. The recovery is the exact reverse: arms extend first, torso rocks forward, and then your legs bend to return to the starting position. This sequential movement — legs, back, arms on the drive; arms, back, legs on the recovery — is what generates power efficiently. When the sequence breaks down and you start pulling with your arms before your legs finish driving, you lose force and waste energy.
The damper setting on the rower is preset to 6 in HYROX competition. In training, experiment with settings between 5 and 7 to find what feels sustainable for a full 1,000 meters. A higher damper setting does not mean more distance per stroke — it means more resistance per stroke, which fatigues you faster. Most athletes perform best at 5 to 7 because it allows a powerful leg drive without excessive upper-body strain.
Stroke rate should sit between 24 and 30 strokes per minute for most athletes. Going higher than 30 tends to sacrifice stroke length and power, meaning you cover less distance per stroke despite working harder. A controlled, powerful stroke at 26 strokes per minute will often produce the same or better split times as a frantic stroke at 34 — with far less metabolic cost.
For pacing, aim for a split time you can hold from the first stroke to the last. Competitive Open athletes typically target 1:50 to 2:05 per 500 meters. First-time racers should aim for 2:05 to 2:20. Starting 5 seconds faster than your sustainable pace will feel manageable for the first 250 meters and catastrophic by 750 meters. It is always better to be slightly conservative for the first 500 meters and then increase effort for the final 500 if you have capacity remaining.
Common Mistakes
Pulling with the arms first. When your arms engage before your legs fully extend, you reduce the power of the strongest muscles in your body — quads and glutes — and transfer the load to your comparatively weak biceps and forearms. Think "push the seat back with your feet" before your arms do anything.
Rushing the recovery. Sliding forward on the seat too quickly does not make you faster — it just shortens the time your muscles have to rest between strokes. Let the recovery be slow and controlled. The ratio should be roughly 1:2 — one count on the drive, two counts on the recovery.
Going out too hard. A 1:45 split for the first 250 meters followed by a 2:20 split for the final 250 is a slower average than rowing a steady 2:00 the entire way. Control your ego in the first quarter and trust the process.
Training Tips
Build rowing fitness with interval work: 4x500m with 90 seconds rest at your target race pace, or 2x1000m at race pace with 3 minutes rest. Practice rowing immediately after a treadmill run or a set of burpees to train your body to produce power on the rower when already fatigued. Track your 1,000m time regularly so you have a reliable benchmark going into race day.
Station 6: Farmers Carry (200 Meters)
The Farmers Carry is deceptively simple: pick up two kettlebells and walk 200 meters. The weights are Open Men 2x24kg, Open Women 2x16kg, Pro Men 2x32kg, and Pro Women 2x24kg. There is no complex technique to learn, no machine to adjust, no target to hit. Just grip and walk. And yet, this station punishes athletes who have not prepared for it, because 200 meters with heavy kettlebells is a long way when your forearms, shoulders, and core are already six stations deep into fatigue.
Pick up the kettlebells by hinging at the hips with a flat back — exactly like a deadlift. Stand tall, pull your shoulders back and down, brace your core, and lock your arms straight at your sides. Your posture should be proud and upright throughout the carry. The moment you start leaning forward or letting your shoulders roll in, the load shifts from your skeletal structure — which can bear it efficiently — to your muscles, which will fatigue rapidly.
Walking pace should be steady and purposeful. Some athletes try to shuffle-run with the kettlebells, and for lighter loads in the Open Women's division this can work. But for heavier loads, the bouncing motion of running increases grip fatigue dramatically and makes it more likely you will need to set the kettlebells down. A brisk, controlled walk is almost always faster overall than a shuffle-run interrupted by multiple rest stops.
Grip endurance is the limiting factor for most athletes at this station. Your forearms have already been worked by the SkiErg, Sled Pull, and Rowing. The cumulative grip fatigue across these stations is one of the most underappreciated challenges in HYROX. Athletes who have never carried heavy kettlebells for 200 meters in training are often shocked at how quickly their grip fails on race day.
The 200-meter course typically involves turns, and turns are where time is lost. Slow down slightly into the turn, keep the kettlebells stable, and accelerate out of it. Sharp turns with heavy weights cause momentum shifts that challenge your balance and spike grip demands. Practice carrying through turns in training so the movement pattern is familiar on race day.
Common Mistakes
Leaning forward. When your torso tilts, the kettlebells swing forward, increasing the load on your grip and lower back. Stay tall. Think about pushing your chest up toward the ceiling.
Setting the kettlebells down too frequently. Every time you set them down, you waste time on the pickup, and the initial few steps after picking them up are always harder than maintaining a carry already in progress. If you must rest, commit to carrying at least 50 meters between stops.
Gripping too hard. A white-knuckle death grip accelerates forearm fatigue. Hold the kettlebells firmly but without maximal effort. Let gravity and your locked-out arms do the work of keeping them in position.
Training Tips
Practice with your race-weight kettlebells for distances of 200 meters or more. If you can carry them 300 meters in training, 200 meters on race day will feel manageable. Build grip endurance with dead hangs for 60 or more seconds, plate pinches, and heavy barbell holds. Integrate carries into your running workouts: run 1km, immediately pick up kettlebells and carry 200 meters, then run another kilometer. This teaches your body to transition between running and carrying under fatigue — exactly what race day demands.
Station 7: Sandbag Lunges (100 Meters)
Sandbag Lunges are 100 meters of alternating forward lunges with a sandbag resting on your upper back and shoulders. The weights are Open Men 20kg, Open Women 10kg, Pro Men 30kg, and Pro Women 20kg. The movement standard requires your rear knee to touch the ground on every single rep. No touch, no count — a judge will call you back. You must alternate legs, and the sandbag must remain on your shoulders throughout. Setting the sandbag down is not permitted during the movement; you either lunge or you stand still.
This station arrives immediately after the Farmers Carry, which means your legs, grip, and core are already deeply fatigued. The quadriceps burn from the Farmers Carry transitions directly into the sustained quad loading of lunges. For many athletes, the Sandbag Lunges are where the race becomes a genuine mental battle. The movement is not technically complex, but performing it for 100 meters with fatigued legs requires grit that no amount of fitness can fully replace.
Technique centers on keeping your torso upright. Position the sandbag high on your upper back, behind your neck, and keep your elbows elevated. This opens your chest and helps you breathe — collapsing forward with the sandbag compresses your diaphragm and makes every breath shallower, which compounds fatigue rapidly. Step forward with a controlled stride, roughly 60 to 70 centimeters. Steps that are too long make the rear knee touch harder to achieve and put excessive strain on the hip flexors. Steps that are too short increase the total number of reps required and slow your forward progress.
Drive out of each lunge by pressing through the heel of your front foot, engaging your glute to stand. Avoid pushing off your back foot — this wastes energy and shifts the load to your calves rather than your larger leg muscles. Once standing, immediately step into the next lunge. Pausing between reps is acceptable if you need to catch your breath, but do so in the standing position, not at the bottom of the lunge where your muscles are under load.
The final 25 meters are where most athletes slow dramatically. Your quads are on fire, your breathing is ragged, and the finish line of the station seems to move further away with each step. This is where training volume pays off. If you have lunged 100 meters with a sandbag multiple times in training, your body knows the sensation and your mind knows it is survivable.
Common Mistakes
Leaning too far forward. A forward lean shifts the sandbag weight onto your neck and upper back, pulling you further out of position. It also compromises your breathing. Stay upright, elbows high, chest proud.
Not getting the knee down. A judge will not count a rep where your rear knee does not clearly touch the ground. In training, always practice with a full knee-to-ground standard. If you develop a habit of partial reps, race day will cost you time and frustration as the judge repeatedly calls you back.
Inconsistent step length. Alternating between long and short steps throws off your rhythm and wastes energy. Find a step length that allows you to comfortably get your rear knee to the floor and stick with it for all 100 meters.
Training Tips
Weighted walking lunges for distance are the best preparation. Start with bodyweight lunges for 100 meters, then add a sandbag at race weight and build up to full 100-meter sets. Bulgarian split squats build the single-leg strength that prevents your quads from failing. Practice lunges after a Farmers Carry simulation — pick up heavy kettlebells, walk 200 meters, set them down, grab a sandbag, and start lunging immediately. That transition is where your race performance is built.
Station 8: Wall Balls (100 Reps)
Wall Balls are the final station, the last obstacle between you and the finish line. The movement is a full-depth squat followed by an explosive stand and throw of a medicine ball to a target on the wall. Pro Men use a 9kg ball thrown to a 3-meter target for 100 reps. Open Men use a 6kg ball to a 3-meter target for 100 reps. Pro Women use a 6kg ball to a 2.7-meter target for 100 reps. Open Women use a 4kg ball to a 2.7-meter target for 75 reps. The ball must clearly hit the target on every rep, and the squat must be below parallel — crease of the hip below the top of the knee. Anything less and the judge will call a no-rep, costing you the energy of a throw without the benefit of a counted rep.
Stand about 30 to 40 centimeters from the wall, feet slightly wider than shoulder-width, toes turned out about 15 degrees. Hold the ball at chest height with your hands on the sides or slightly underneath. Descend into a full squat, keeping your chest upright and your weight in your heels. At the bottom of the squat, drive explosively through your legs and use that upward momentum to throw the ball to the target. Your arms guide the ball, but the power comes from your legs. If you try to press the ball upward using your shoulders and triceps, you will fatigue within 30 reps and have 70 agonizing reps left to go.
Catching the ball is where efficiency is gained or lost. As the ball drops from the target, catch it at chest height and immediately begin descending into your next squat. The catch and the squat initiation should be one fluid motion — catch, absorb, descend. If you catch the ball, pause, readjust your grip, and then squat, you are adding a second or more to every rep. Over 100 reps, that adds up to nearly two minutes of wasted time.
Breathing rhythm is critical for sustaining effort across all reps. Exhale forcefully as you throw the ball upward. Inhale during the descent and catch. This two-beat rhythm — exhale on effort, inhale on recovery — prevents the chaotic, gasping breathing that causes many athletes to fall apart in the second half of this station. When fatigue starts to distort your rhythm, focus on the exhale. A strong exhale forces a natural inhale and keeps you in control.
Pacing strategy depends on your fitness level. Elite athletes often complete all 100 reps unbroken in under three minutes. For most HYROX participants, breaking the reps into manageable sets is more effective — sets of 20 or 25 with a 5-second rest between sets. The key is to plan your break structure before you start. Deciding on the fly when to rest leads to increasingly frequent and longer breaks as fatigue takes hold. If your plan is sets of 25, commit to it: 25 reps, 5 seconds rest, 25 reps, 5 seconds rest, 25 reps, 5 seconds rest, 25 reps, done. That structure gives you control over the station rather than letting the station control you.
Common Mistakes
Shallow squats. No-reps are the silent killer of Wall Ball performance. Every no-rep costs you the energy of a throw without the benefit of a counted rep. Squat deep on every single rep, even when your legs are screaming. If you cannot maintain depth at your current pace, slow down rather than accumulate no-reps.
Standing too far from the wall. When you stand more than half a meter from the wall, you have to throw the ball at an angle, which requires more force and makes catching the rebound harder. Get close to the wall and throw straight up.
Resting too long between sets. A 5-second rest is enough to take two deep breaths and reset. A 15-second rest lets your legs stiffen and your heart rate drop, making the first few reps of the next set feel harder than the last few of the previous set. Brief, planned rests outperform long, unplanned ones every time.
Training Tips
Build your wall ball capacity progressively. Start with sets of 25 at race weight, rest 60 seconds, and repeat for 4 sets. Over time, reduce the rest and increase the set size until you can complete 50 unbroken and 100 total with minimal rest. The most valuable wall ball training is done under fatigue — run 1km, then immediately do 100 wall balls. That simulation is the closest you can get to replicating the demand of the final station on race day. The last 30 reps are always mental. Train through them regularly so you know the feeling, and on race day, remind yourself that the finish line is just 30 throws away.
References
- Haff, G.G. & Triplett, N.T. (2016). Essentials of Strength Training and Conditioning (4th ed.). National Strength and Conditioning Association.
- McGill, S.M. (2010). Core Training: Evidence Translating to Better Performance and Injury Prevention. Strength and Conditioning Journal, 32(3), 33-46.
- Comfort, P., McMahon, J.J., & Suchomel, T.J. (2018). Optimizing Squat Technique. Strength and Conditioning Journal, 40(6), 95-106.